消息推送系统基础概念
- 主题(Subject/Topic)
主题就是一个字符串表示的名称,能确保发布者和订阅者可以使用该名称来查找对方。
- 发布者(Publisher)
消息的发送方。
- 订阅者(Subscriber)
消息的接收方(消费方)。
安装
这步其实我想省略的,因为我觉得安装部署东西必须是自学必备的基础,一般官方的QuickStart都有.想到方便可能有除我以外阅读的人快速入门,就加上了。
nats-server安装
一般服务器只用到nats-server,但是为了方便我们开发调试,推荐再安装nats,是一个方便使用nats的cli工具。
-
docker-compose
version: "3.5"
services:
  nats:
    image: nats:alpine
    ports:
      - "8222:8222"
      - "4222:4222"
    command: "--cluster_name NATS --cluster nats://0.0.0.0:6222 --http_port 8222 "
    networks: ["nats"]
  nats-1:
    image: nats:alpine
    command: "--cluster_name NATS --cluster nats://0.0.0.0:6222 --routes=nats://ruser:T0pS3cr3t@nats:6222"
    networks: ["nats"]
    depends_on: ["nats"]
  nats-2:
    image: nats:alpine
    command: "--cluster_name NATS --cluster nats://0.0.0.0:6222 --routes=nats://ruser:T0pS3cr3t@nats:6222"
    networks: ["nats"]
    depends_on: ["nats"]

networks:
  nats:
    name: nats
nats安装(nats-cli)
- github地址
- 一键安装
go install github.com/nats-io/natscli/nats@latest
- 初始化
nats context add nats --server localhost:4222 --description "docker-compose nats" --select
发布-订阅
描述:所有订阅者接收发布者发送的每一条消息。一个发布者发送的每一条消息由全部同一主题的订阅者接收。
命令
发布 (详细使用参考nats sub --help)
// 发布一个主题为helloworld,消息内容为msg1
nats pub helloworld msg1
订阅 (详细使用参考nats pub --help)
// 接收主题为msg1的消息
nats pub helloworld
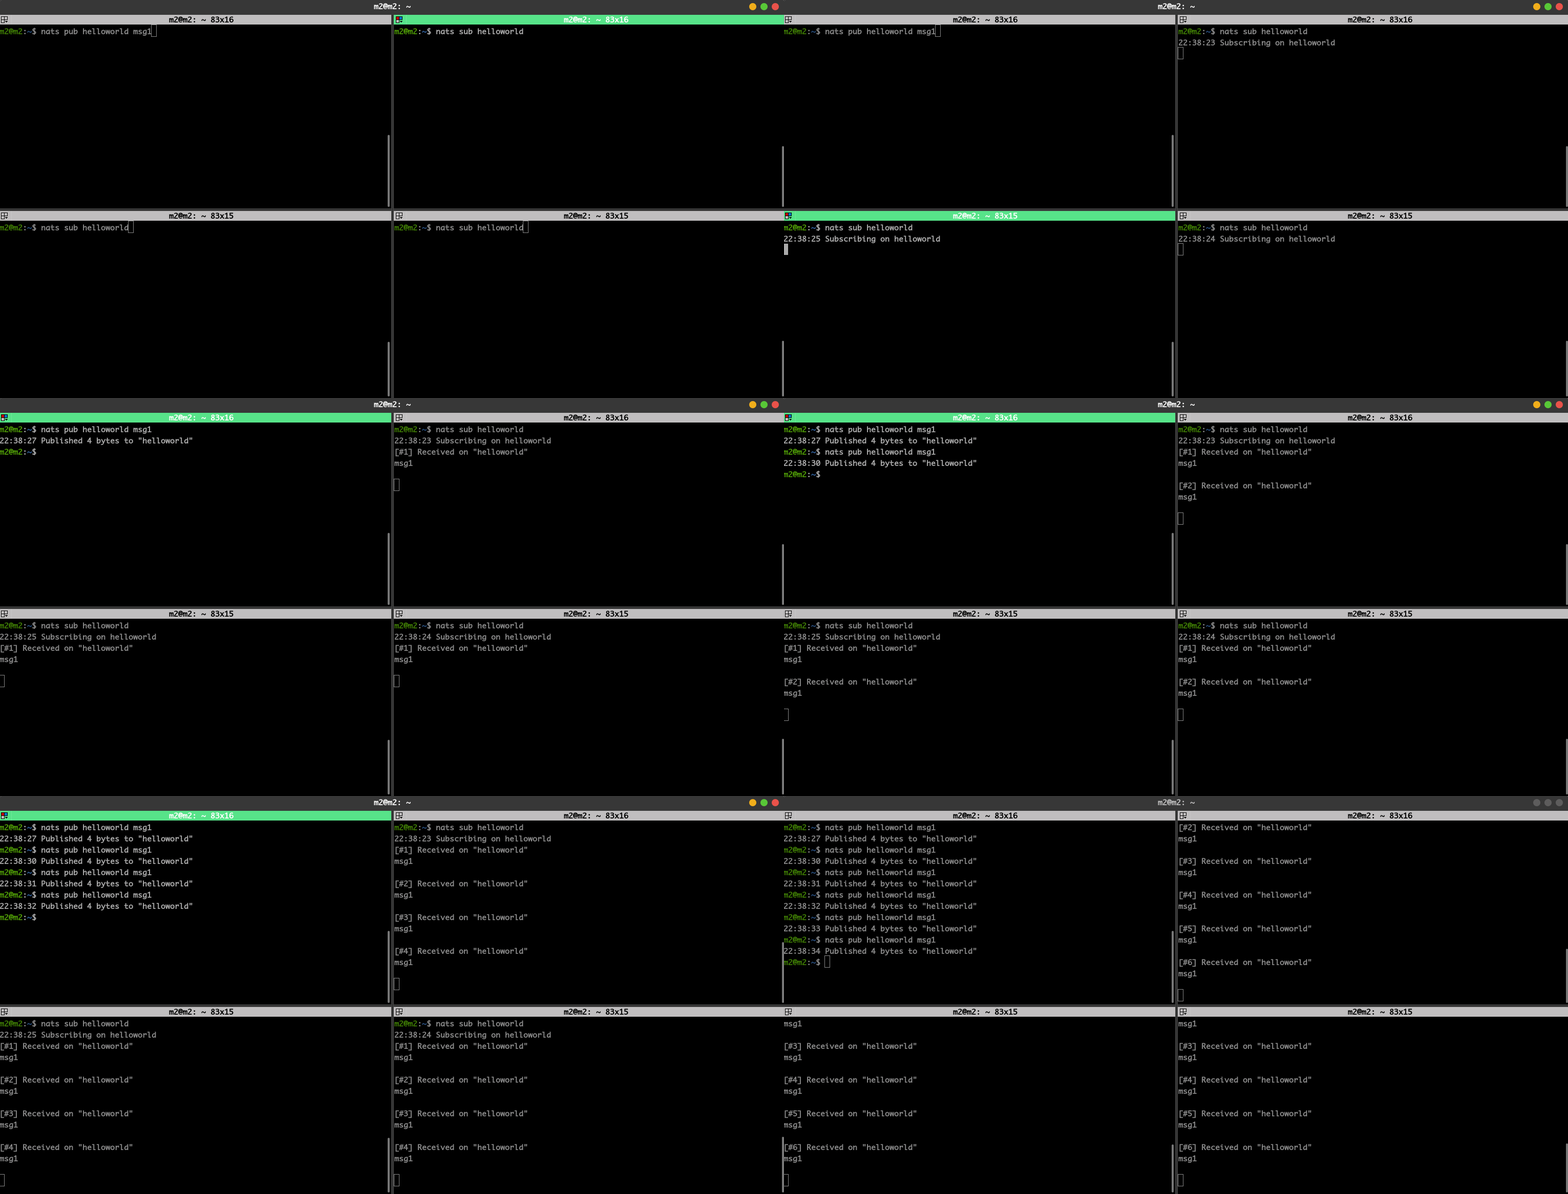
运行效果

go代码
import (
	"fmt"
	"runtime"

	"github.com/nats-io/nats.go"
)

var nc *nats.Conn

func main() {
	//获取连接
	nc, _ = nats.Connect(nats.DefaultOptions.Url)
	//订阅
	nc.Subscribe("helloworld", func(m *nats.Msg) {
		fmt.Printf("Received a message: %s\n", string(m.Data))
	})
	//发布
	nc.Publish("helloworld", []byte("msg1"))
	ch := make(chan os.Signal, 1)
	signal.Notify(ch, os.Interrupt)

	<-ch
	nc.Close()
	log.Println("exit")
}
运行结果
// 会被阻塞,监听了ctrl+c中断事件
$ go run main.go
Received a message: msg1
| #表阻塞
消息队列
描述:同一队列收到同一主题所有消息,但是并不是该队列的订阅者都会收到消息,具体看消费能力和数据数量. 消息队列属于类似均摊的操作.
命令
发布
# 发送3条消息,并且动态填写msg1,msg2,msg3
nats pub --count=3 helloworld msg{{Count}}
订阅
# q1队列订阅主题为helloworld
nats sub helloworld --queue=q1
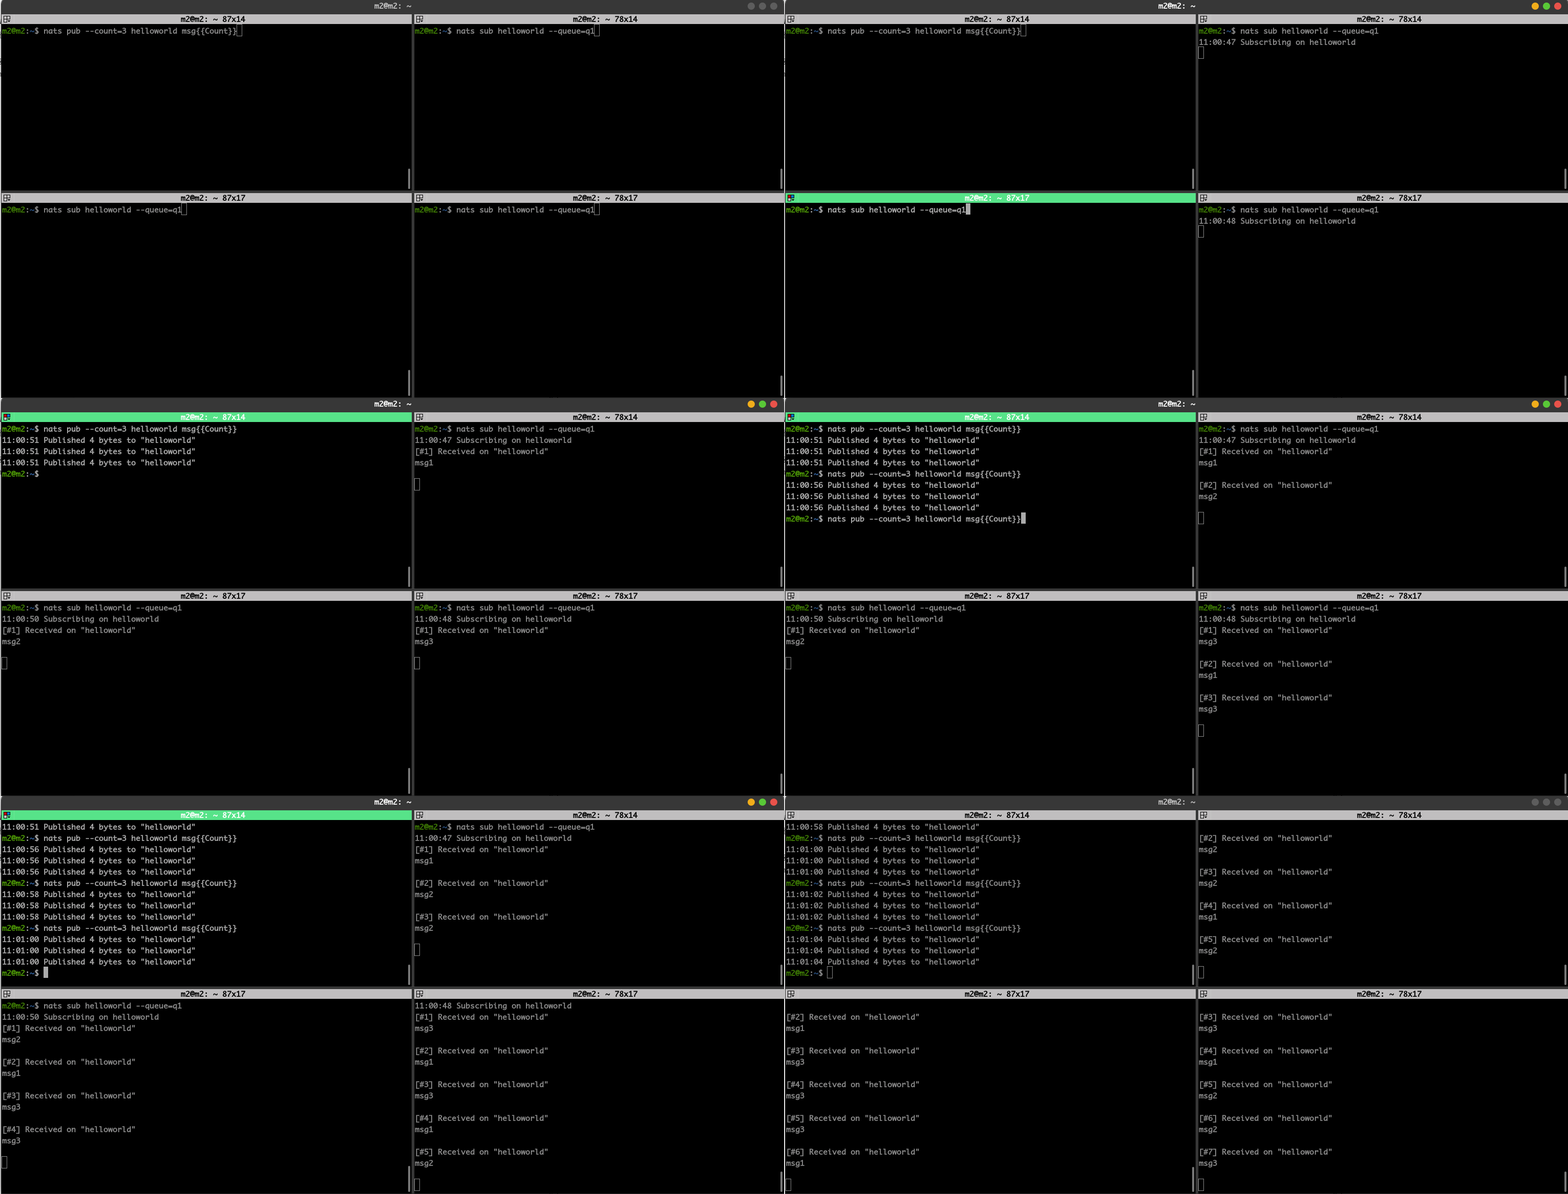
运行效果

go代码
//订阅者增加一个队列名称,发布者写法不变
nc.QueueSubscribe("helloworld", "q1", func(m *nats.Msg) {
		fmt.Printf("Received a message: %s\n", string(m.Data))
	})
请求-相应
订阅者收到发布者消息后会发出一个确认消息,一条消息只会有一个订阅者收到并返回确认消息。
命令
- 订阅者
# 订阅主题为helloworld的主题,一旦接收到该主题的消息则相应一个确认消息回去。{{Time}}为动态获取时间
nats reply helloworld "reply1-我已收到, {{Time}}"
- 发布者
# 请求主题为helloworld,消息内容为msg1
nats request helloworld msg1
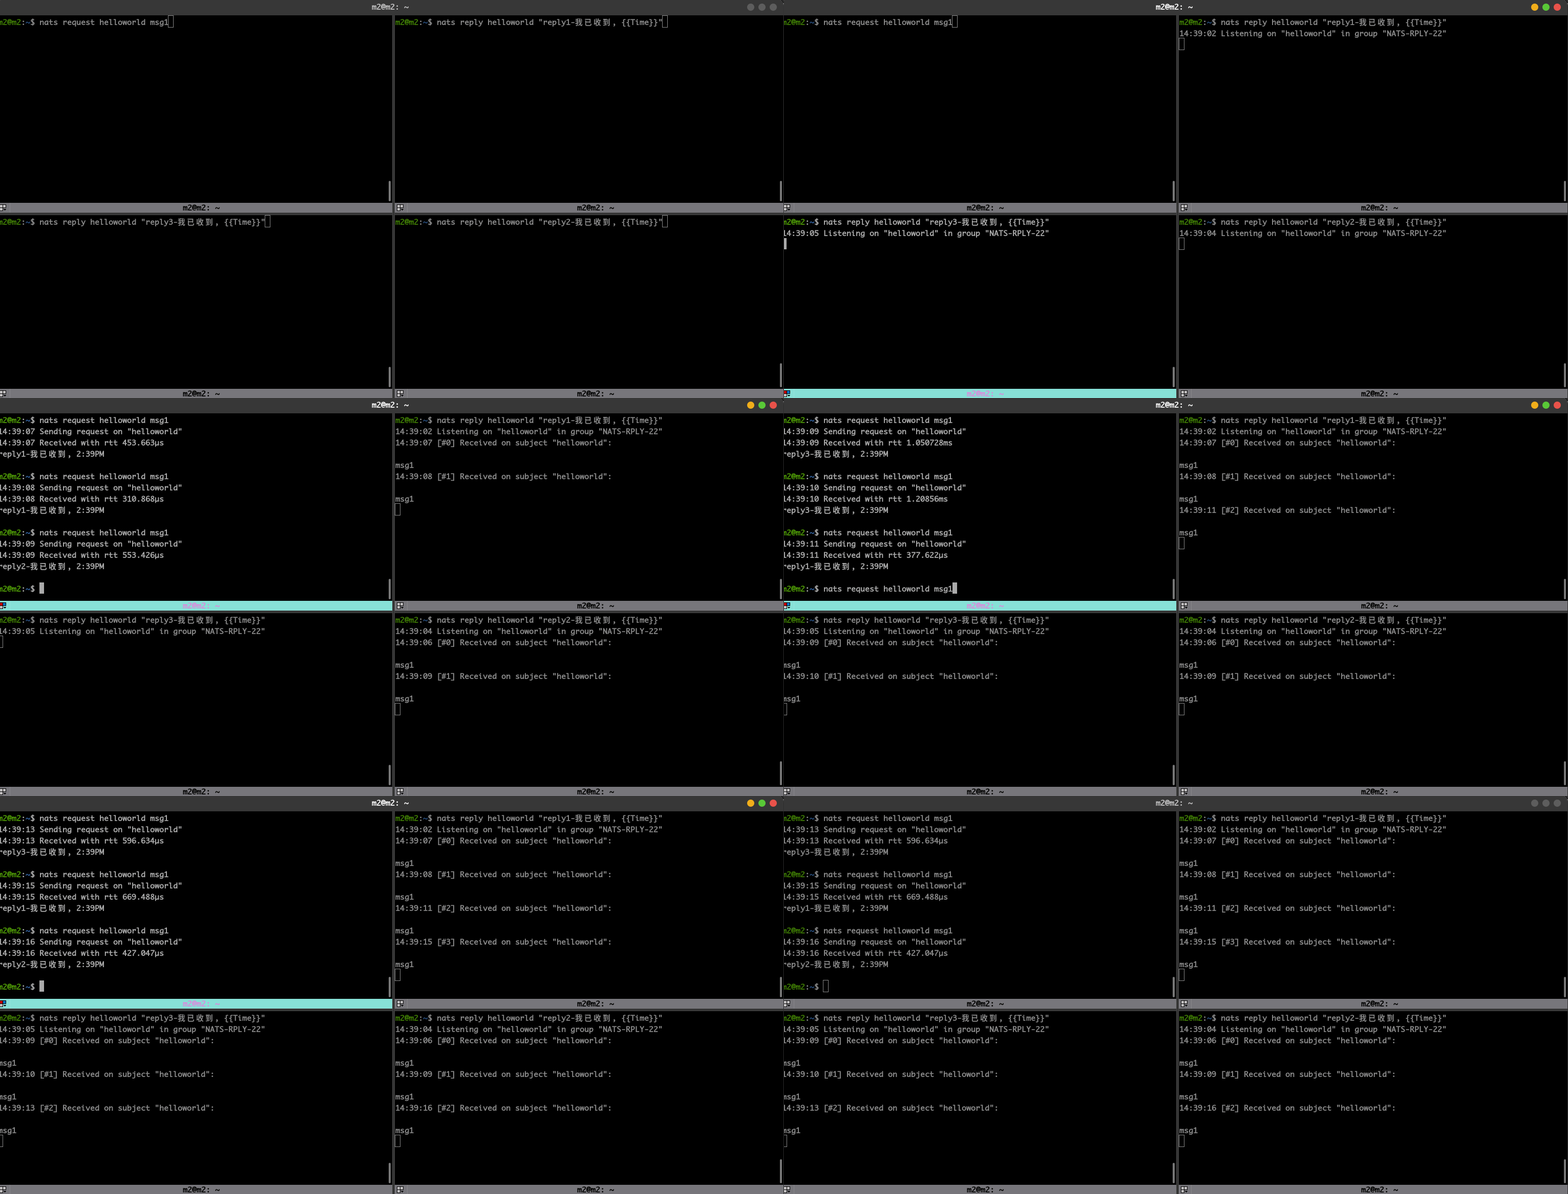
运行效果

go代码
func main(){
    RequestReply()
}
func RequestReply() {
	nc, _ = nats.Connect(nats.DefaultURL)

	// Replies
	nc.Subscribe("helloworld", func(m *nats.Msg) {
		//接收到的消息
		fmt.Printf("Received a message: %s\n", string(m.Data))
		//相应的消息
		nc.Publish(m.Reply, []byte("已经收到!"))
	})

	msg, _ := nc.Request("helloworld", []byte("msg1"), 10*time.Millisecond)
	log.Println("reply: ", string(msg.Data))
}
$ go run main.go
Received a message: msg1
2022/10/20 14:57:49 reply:  已经收到!
Subject命名和多级匹配
- 主题(subject)命名
推荐字符:a to z, A to Z, 0 to 9 (大小写敏感, 不能有空格)
特殊字符: (*,>)为特殊字符有特别含义,多级匹配等 , $开头的为系统使用的
- 多级匹配
# subjects
time.us
time.us.east
time.us.east.atlanta
time.eu.east
time.eu.warsaw
匹配规则如图: *为(.与.之间省略), >为(最左匹配)
参考
Q.E.D.


